I love Asian food and have been fortunate to travel to China and Hong Kong a few times to visit my parents while they worked in an orphanage over there. With their local knowledge, I got to experience real food cooked by the locals. My son loved the steamed bun and dumplings and they have been on my long list of recipes to adapt to failsafe. With a bit of encouragement from a few people on the Failsafe facebook group, I moved the steamed buns up higher on my list to adapt! Hopefully I will get around to working on the dumplings real soon too…
Traditionally steamed buns are filled with BBQ Pork or a sweet red bean paste. In finding something rich in flavour like the BBQ Pork (pork is high amines) that I could convert to failsafe so my kids could eat it without a reaction, I couldn’t go past Trish’s Magic Sauce to add to chicken. It is perfect! It is a great substitute for soy sauce or other Asian sauces. Her traditional method for cooking it can be found here on her blog, or I have translated it into Thermospeak for those with a Thermomix. Adding shredded chicken to this sauce made a really simple and yummy filling and my 3 couldn’t get enough of them and loved having them in their lunch boxes for school.
To make a version of the sweet red bean steamed bun, I started investigating red beans, or Azuki Bean as they are called. I couldn’t really find anything to confirm that they are suitable for the failsafe diet, although they do belong to the same family of beans that are. I don’t know how reliable this site is when it comes to failsafe, but The Food Coach listed them as low in Salicylates, Amines, and Glutamates. So far we have not had a reaction, but everyone is different, and please don’t take my word for it… I would suggest if you are on the failsafe diet, especially the Elimination phase, to use it as a challenge if you are interested. Would love to hear feed back if you do.
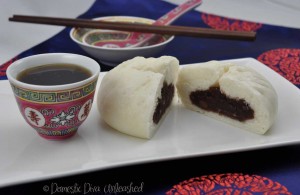
Azuki beans can be found in Asian supermarkets, we found a bag of them which requires soaking and even a tin as you would buy red kidney beans. Surprisingly the ingredients listed are “water, sugar, red beans, salt, vitamin C, citric acid” They tasted divine, and I had to stop myself from eating straight from the can with a spoon, lol. I checked out a second Asian supermarket and the tin of red beans that they had was not failsafe, so always check the ingredients! I tried making the steamed bun with both types of the bean, the dried and the tin. My kids preferred the dried version and my husband and I preferred the tin, which surprised me as the tin was much sweeter.
Trish’s Magic sauce in the Thermomix
160g Golden syrup
60g gin
70g syrup reserved from tinned pears
1 1/2 tsp salt
10g carob syrup
1 tsp tapioca starch
Add all ingredients into the Thermomix bowl. Cook for 12 minutes on speed 3 on 100 deg. Leave the MC (measuring cup) off and place the basket on top of the lid to help it reduce.
To prepare the Chicken filling:
This chicken filling also has many uses, you can use it in spring rolls, wraps, on bread rolls for lunch, and I have even used it in omelettes for dinner which my kids loved!
500g diced chicken breast,
6 tablespoons of Magic Sauce.
Marinate the chicken in 2 tablespoons of the Magic sauce while you make the dough…
Cook the chicken in a frying pan or skillet until it is cooked through.
Shread chicken for 2 sec on reverse speed 4. Transfer to a bowl. If you don’t have a Thermomix, dice the chicken finely. Add approx 4 tablespoons more of the Magic Sauce to the chicken and stir through to coat.
Azuki Red Bean Filling:
I adapted this recipe from Just One Cookbook to make in the Thermomix. Follow the link for the non-thermomix version. I tried a few different batches of beans and one lot of beans I bought just didn’t plump up in the water or cook nicely at all for some reason. I did find that soaking the beans over night as opposed to 4-6 hours, I got a much better result with the final out come, the beans were plumper and cooked through well. The beans seemed to stay harder even after cooking with a shorter soaking time.
200g azuki red beans (soaked over night)
Water
200g Sugar
Pinch salt
Drain beans after soaking in enough water to cover them. Place into the Thermomix bowl and add 300g water. Cook for 10 minutes at 100°C on speed soft. Drain water again, return beans to Thermomix bowl and add another 300g water. Continue to cook for 10 minutes at 100°C on reverse speed 2. Add the sugar and salt. Cook for 10 minutes at 100°C on reverse speed 2.
Allow to cool completely before using in the steam buns.
The Steam Buns:
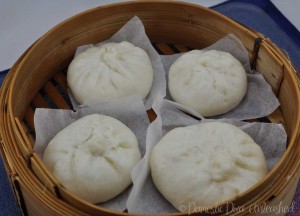
I tried 3 variations of these. None of them seem to rise too much (maybe the weather was just too cold, even sitting next to a warm oven to help it along) they rose a little bit while cooking, but they all tasted great. I used the recipe in the “A Taste of Asia” Thermomix cookbook on page 20 the first time. That was the recipe I used that said place ALL the ingredients into the Thermomix bowl… but don’t do my mistake and add the water as well, don’t add ALL the ingredients, the water is supposed to be used for steaming, lol! I got it right the second time I made this recipe. I steamed some in the Varoma and also in a traditional Chinese steamer over a wok, both ways tasted great and had a good texture.
The second one I tried was this recipe from Yi Reservation. I still mixed them in the thermomix (it’s much quicker…) but follow the link for the original recipe. Below is my Thermomix conversion of it. The third way I made them, I found a packet mix at the Asian supermarket to make them. The ingredients listed were all failsafe and I just had to add milk or water and sugar.
400g plain flour
1 tablespoon dried yeast
1/2 teaspoon baking powder
200g milk or water
40g sugar
Pinch salt
Pinch of baking soda (optional)
1 ltr of water for steaming
Place all the ingredients into the Thermomix bowl except the water for steaming (just thought I would clarify that, lol!) and mix to combine for 6 seconds on speed 6. Then set to closed lid position and knead for 2 minutes on interval speed. Either place the dough in a mixing bowl or wrap in the Thermomat and leave to rise for 45 – 60 minutes or until it doubles in size.
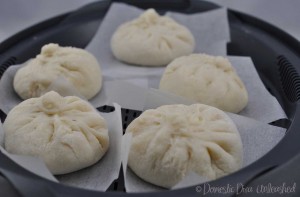
Cut 12 squares approx 6 cm out of baking paper to sit the bun on for steaming.Working on a floured surface, divide the dough in half, then from each half divide into 6 balls so you have 12 altogether. Use your fingers to flatten or a rolling pin to roll out each ball into a flat circle approx the size of your palm. Pick up the dough and spoon a generous dessert spoon of the filling into the middle. Pinch and pleat the sides together until you have worked all the way around to seal the bun. I used this tutorial to learn how to fold them correctly, she makes the whole bbq pork steamed buns (which are not failsafe), but jump through to 5:20 minutes where she demonstrated how to fold them. Otherwise, if all else fails, you can just make them into a round ball. Place the buns onto a square of baking paper in your steamer or Varoma. Don’t over crowd the buns and allow space for them to rise. Leave for another 30 minutes before steaming to rise.
Place 1 ltr of water into the Thermomix bowl. Place the Varoma on top. Steam the buns for 10 minutes at Varoma temperature on speed 4. Make sure to check the water level in the Thermomix if cooking them in a few batches so you don’t run it dry. One of the batches I made required 15 minutes to cook, so just make sure the dough is cooked, light and fluffy and not moist and doughy still.
Easy Chicken Noodles
This is a simple and easy dish I made at the same that the second batch of buns were cooking in the Varoma. You could also steam them in the Chinese bamboo steamer. It made a great accompaniment to have for dinner with the buns. Add as much noodles and wombok you require to feed your family.
Udon or rice noodles
Wombok, sliced into long strips
Left over chicken mixture mixed with the Magic sauce
Place the noodles and wombok into the Varoma bowl. Place the tray with steam buns on it on the top. Cook for the same amount of time as the buns as above, 10 minutes at Varoma temperature on speed 4. Or if doing it in the bamboo steamer, place a piece of baking paper under the ingredients or in a bowl to steam. Pour the noodles and wombok into the Thermoserver (or a bowl), add the remainder of the chicken mixture and toss to combine. Serve in little bowls with the steam buns.





Just started salivating!! Remembering all the times picking up steamed buns before we jumped on a bus or train in China. Oh, so good!!!!
thx for the reicpe.. my kids love chinese bun.. i make it tomorrow they will very happy 🙂 do u got Chinese dumplings???
Wonderful, let me know how you go. I am working on the dumplings, hopefully will have them ready soon. 🙂
yup….
waiting the dumpling recipe hehhee
Thank you so much for making up all these recipes and publishing them for us ‘other’ failsafers. What a wonderful inspiration you are.
i did it… very good result…
thank u 🙂 my kids very enjoy it !!!
That’s great! Glad to hear they enjoyed it.
For the red bean paste – shouldn’t there be another step where you purree it?
Hi Maria, I found after cooking the red beans they softened and cooked down without needing to be puréed. We liked the texture. If you would prefer a smoother texture you could puree it on speed 6 for approx 20 seconds.
That’s what I ended up doing – the beans were cooked and softened but there was so much water it was like a soup and I wouldn’t have been able to use it as filling before mashing them. Maybe I did something wrong.
Also I found that when I steamed the buns for 15-20 minutes they rised much more.
All in all very delicious & it was my first attempt. Will try the chicken version soon.
I’ve just discovered your fabulous recipes! My 18 month old twin sons are sensitive to salicylates and a number of other things and I have been struggling to increase our repertoire of meals, so I am very keen to try new things.
I was just wondering what type of udon noodles you use? I’ve only ever seen the dried ones, do you cook them first?
So glad you have found my blog! 🙂 You can find soft udon noodles in the Asian section of the supermarket. There are a few brands available, I have been buying the KanTong ones lately. Ingredients are rice, water, potato starch, food acid (lactic acid). I like the fresh ones for a quick meal as they just need to be warmed through the dish I am making for a few minutes. If you can’t find the fresh ones you can use the dried ones and cook in water.
Thanks so much Rona! I will have a look for them.